
Introduction
The Tomorrow Lab team and friends are back again for the final episode of Season 3 of our YouTube Series, Potentially Genius. For this episode, Tomorrow Lab’s guest is Alessandro Ranellucci (former VP of Products at Arduino) who introduces the Arduino Plug and Make Kit, a beginner friendly DIY electronics kit aiming to make tech more accessible and fun for all. “The idea is that you start from ‘see what happens’, so the final result or instant gratification of something moving in front of you, and then going back to understand how it worked,” explains Ranellucci. The building blocks inside the kit, Ranellucci and Arduino call the “modulinos,” that can be daisy chained starting from an Arduino R4 that has a simple quick connector. From that quick connector the user can connect one node and each node has a second port on the opposite side, allowing each node to be connected to another by a wire, and so on. The end product allows the user to view and show others just what each node does and how it was connected to reach the desired, interactive effect.
Ranellucci challenged the Tomorrow Lab team to create a unique application for the Arduino Plug and Make Kit that highlights the value of physical technology interfaces and to develop a new Modulino to integrate into the kit.
How Tomorrow Lab Engineered the Design

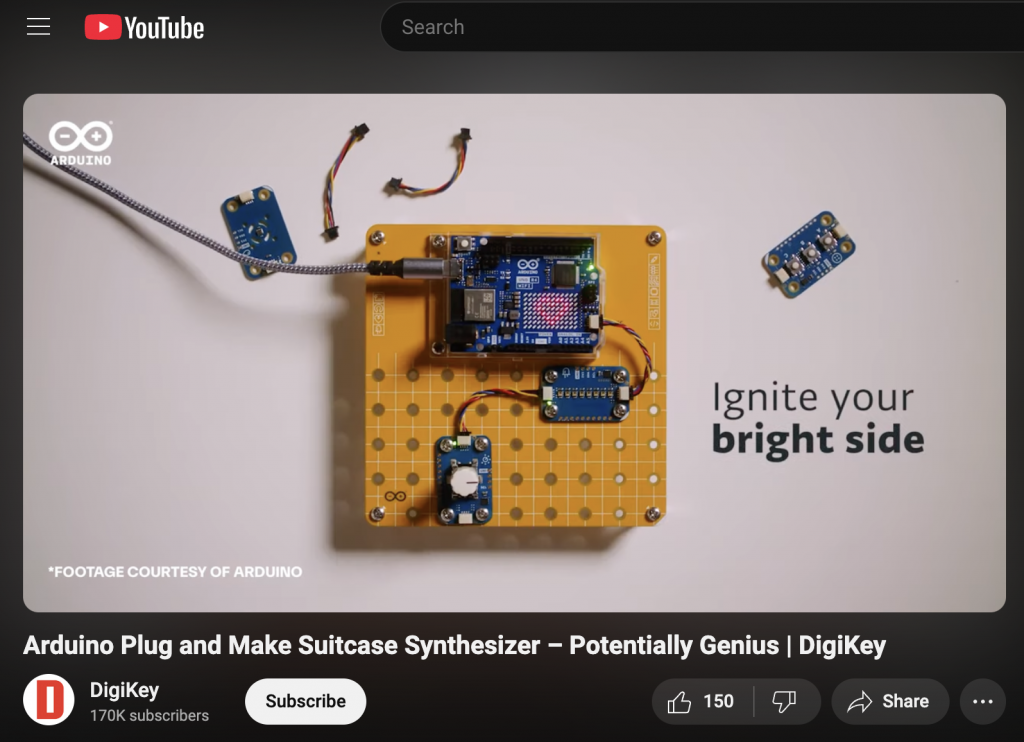
The Plug and Make kit is this educational tool kit that allows users to quickly create their own circuits and electronic systems without much hardware experience stylishly. The kit includes a microcontroller Arduino Uno R4 – an IoT microcontroller that has a built-in LED matrix, 7 varieties of sensors designed with QWIIC I2C connectors, and a beautifully designed PCB Modulino base that can make any project look neat. The modular aspects and cool design gave the team a lot of ideas. At first, the Tomorrow Lab team considered three ideas: a 3D printed dollhouse-style smart home controller, a fold out cardboard subway status display and a musical synthesizer keyboard. With the intention of showcasing as much as modulino as possible and leaning into the modular design idea. They land on the musical keyboard as this idea. Tomorrow Lab’s Partner Pepin Gelardi explains that by using capacitive materials, a capacitive break out module and repurposing the seven stock modulinos, they are able to create musical inputs and outputs for the synthesizer.
With the idea in mind, one of Tomorrow Lab’s electrical engineers, Shuang Cai orders a few components from our series sponsor, DigiKey: one MPR121 capacitive touch sensor and one neopixel driver, both manufactured by Adafruit.
Tomorrow Lab’s industrial designer, Jesse Klein gets the ball rolling on how to build out the device. He shows us his CAD of the platform the modulinos will be attached to, with a handle that also acts as the device’s stand. One important aspect of the Plug and Make kit is that the entire system is modular – meaning that you can assemble the system with different iterations. With this philosophy in mind, Klein designed the actual keyboard as a separate part that will be connected only by wires and magnets. Ensuring that our design will be able to be taken apart and folded back up to take with you.
Assembling & Prototyping the Design
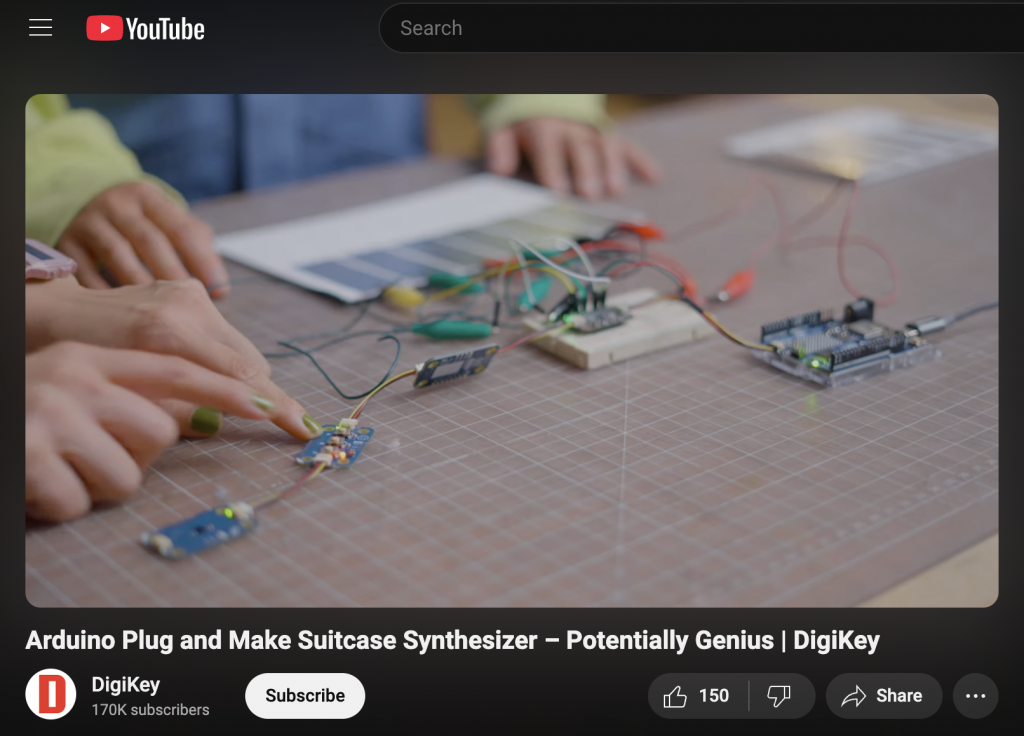
For the prototyping phase, Cai and Tomorrow Lab’s shop tech Ginger Lau go over what exactly will be laid out on the PCB for the synthesizer. The capacitive touch breakout connects to each individual key, powered by the modulinos. Lau asks what each modulino does and Cai explains that she coded one to make the sound when the key is touched, another to adjust the octave of the sound and then another that adjusts the frequency of the keys adjusted by the distance of the user’s hand.
Moving onto the assembly, Klein explains that sometimes screws are needed for plastic 3D printed parts, and in order to do so he needs to add heat set inserts to create the screw threads for the folding frame that works as a kickstand. Klein and Gelardi sit down with all the parts to do a dry run of the assembly, testing which parts will work best both functionally and aesthetically.
The Ardunio board sets into the frame that holds the build plate that comes with the modulinos and will have heat set inserts throughout, so it can be screwed directly into. They use a 3D printed block to represent the keyboard PCB, and it goes into a printed frame that clips into the back with magnets for easy transport or storage.
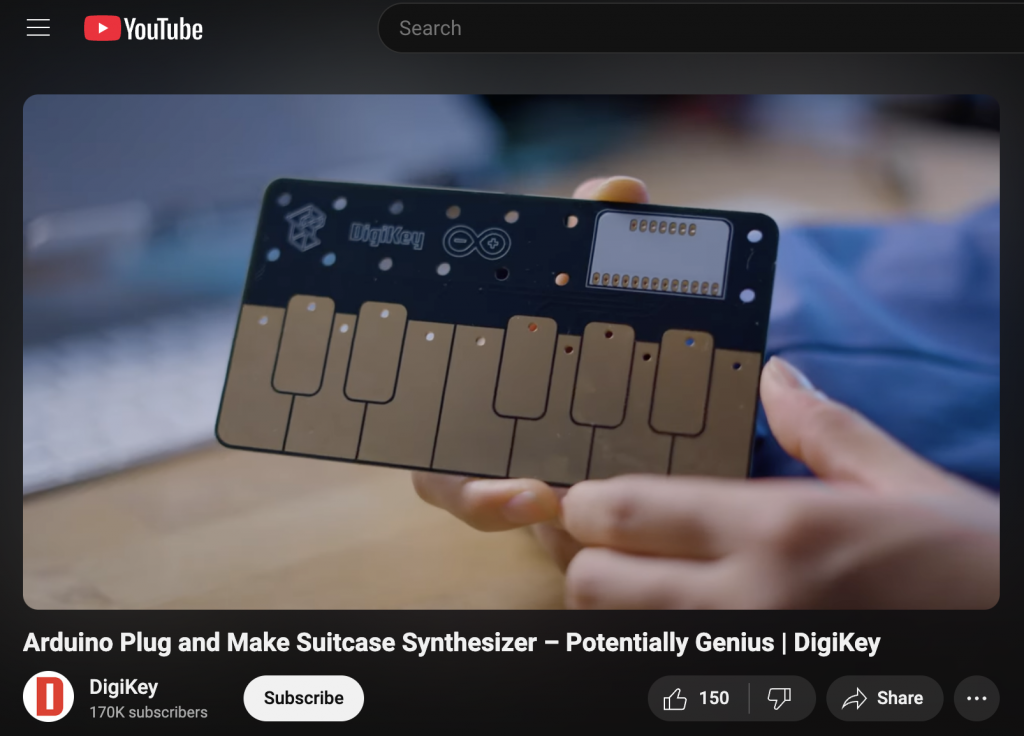
As it turns out, this is Cai’s first capacitive touch PCB design. Cai goes on to explain the custom keyboard capacitive PCB, and what makes it different from a regular PCB. A capacitive PCB differs due to the grounding and tracing that minimizes overlapping on the front and back. Because the Plug and Make Kit already includes a PCB that is nicely designed, Cai wanted to stay with the fun, playful interface and decided to add some light hearted details like the Tomorrow Lab log, DigiKey logo, Potentially Genius title and episode number and a little ditty on the back of the keyboard, “this is the cool side; don’t let the keys know.”
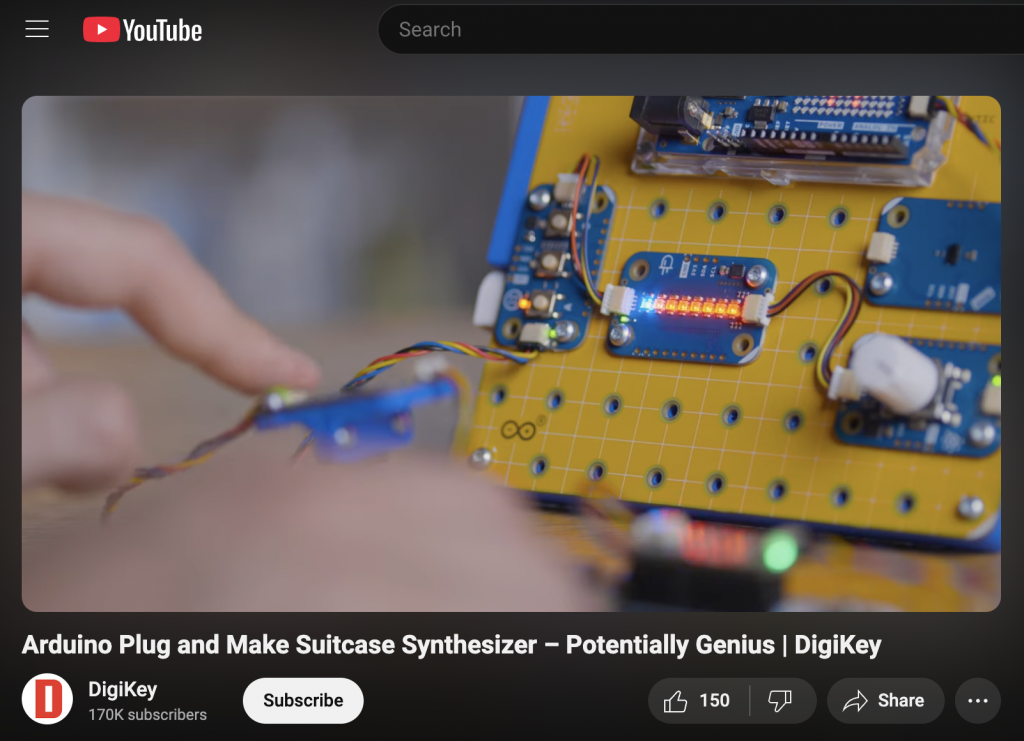
Klein moves ahead to complete the final assembly combining the 3D parts and electronics. Integrating the buzzer that makes the sound, buttons that change the octave up and down, knob that adjusts the bravado, distance sensor that effects depth, a tilt sensor or IMU to bend the pitch back and forth, LEDs to show the status of the pitch bend, and an LED matrix to show graphics.
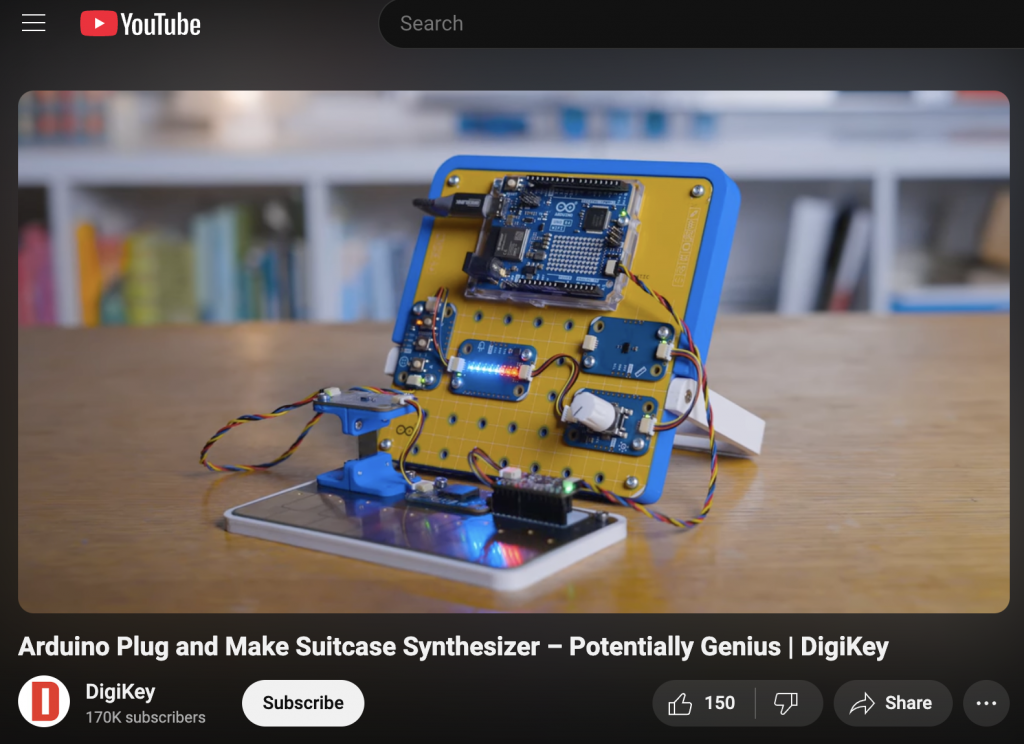
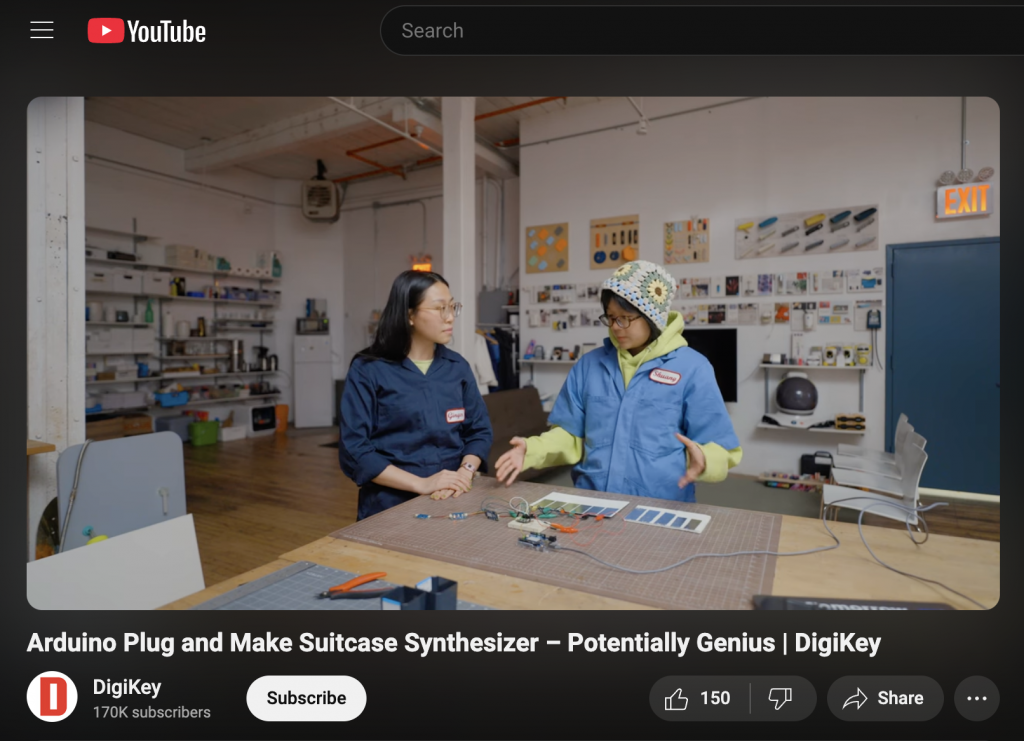
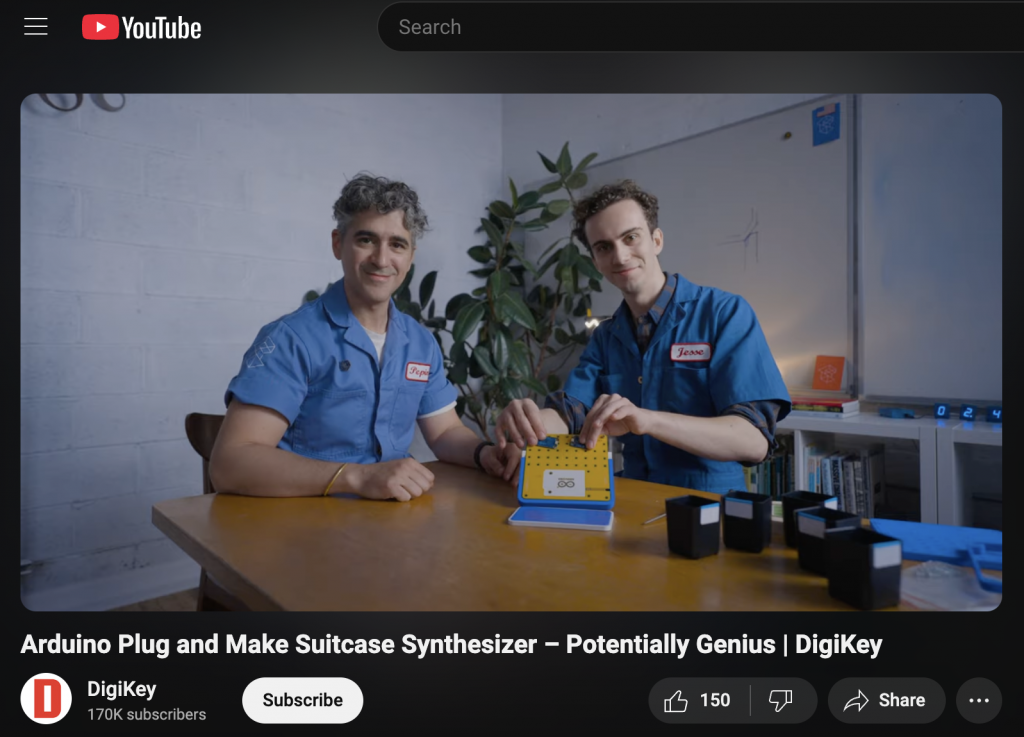
We finally get to show Ranellucci the Suitcase Synthesizer! Klein presents to the team and exclaims, “at the heart of it, is the uno r4 wifi, connected to our monophonic buzzer. To play and produce tones, we have our custom built capacitive keys powered by an mpr121 capacitive sensor. The three buttons are used to select different octaves. Clicking the knob, turns on a bravado effect which can be altered by turning the knob and moving your hand closer or further from the distance sensor. A custom 3D printed spring platform turns the IMU, or tilt sensor into a pitch bend stick. The LED light bar and built in matrix display provide helpful visual feedback as we warp our sounds, showing the names of notes and strength of the bravado and pitch bend. Taken together we have a delightful synth you can play and alter with new modulators and changes in code and fold up and take with you when you’re done!” Klein ends the demonstration by showing off his keyboarding skills playing the classic Beethoven song Fur Elise.
“I want that. You went way beyond a concept. This is a shelf ready consumer product! This is a fantastic example of how to use different modules in the same project in a meaningful way,” says Ranellucci. Success indeed! Another Potentially Genius idea turned into a Potentially Genius thing!
Season 4 is coming to YouTube later in 2025 and we cannot wait to share!
For other musical interests, check out the Potentially Genius episode where the team makes an instrument with kids in mind!
Have an Idea for an Innovative Product?
Turn your potentially genius project into a real life product, fill out an inquiry here to schedule a complimentary call with Tomorrow Lab.